In this article, there is a series of tricks and strategies to create interesting segments for our contacts. You can use them for better focused campaigns that target more specific audiences and, in return, will get you better conversion rates.
Segments based on categories of visited products
With this strategy, we'll create a series of segments that will gather contacts that visit products of different categories. To begin, we need to create the 3 static segments needed. In this example, the three segments will be like the following:
- Interest in shoes
- Interest in hats
- Interest in pants
Next, we'll make a workflow that keeps track of events related to visited products for all contacts. Then, when a contact visits a product of categories previously mentioned, we'll put them in the proper segment.
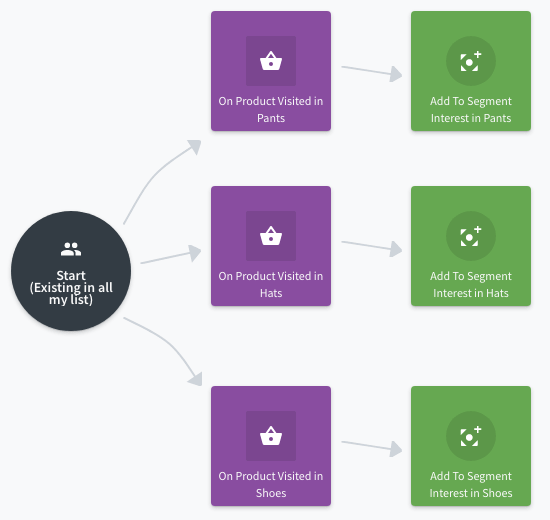
The main point of this workflow has to do with the setting of the trigger nodes "On product visited". These nodes have a filter that activates, among other things, when the products visited are part of a specified category. For example, this is the configuration page of the node "On product visited in Shoes":

With this strategy, we can create as many static segments as we want, with the purpose of including contacts that visit products from our site. The segments are not excluding, meaning a contact can be in multiple segments of this type at the same time. Keep in mind that, once the contact enters a segment, they will stay there, at least with this workflow structure.
Add group of contacts from a CSV file
There are situations in which we may have an email list for contacts that we already have in Connectif and we would like to label or put them on a segment in a simple way, without going one by one. This is possible thanks to Connectif's own tool to import contacts.
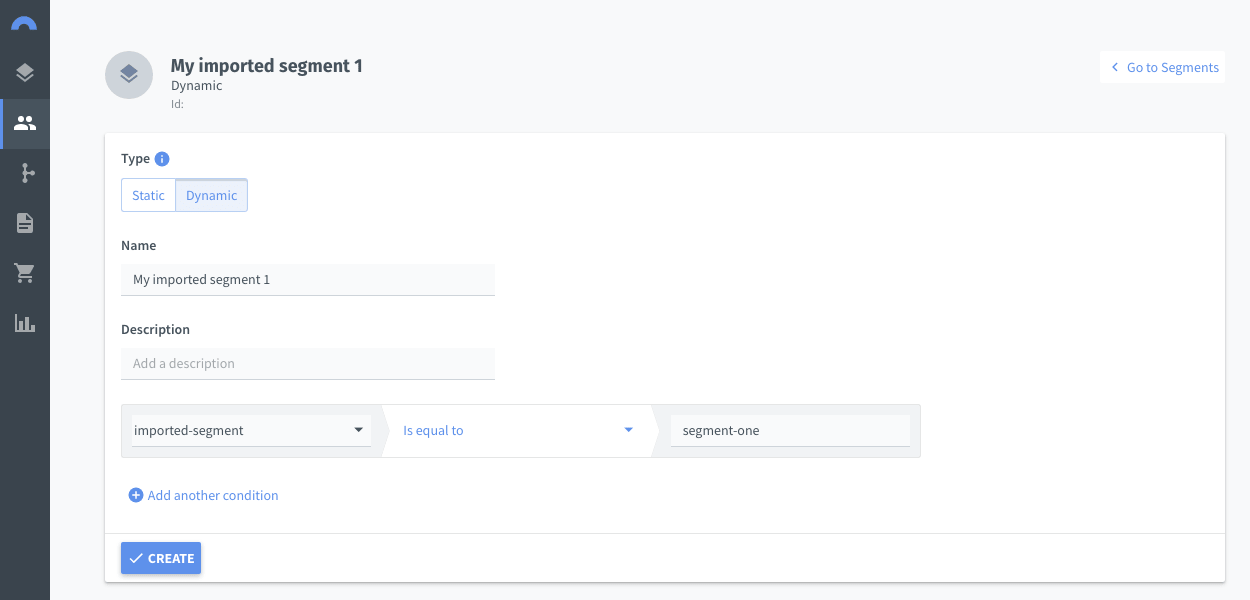
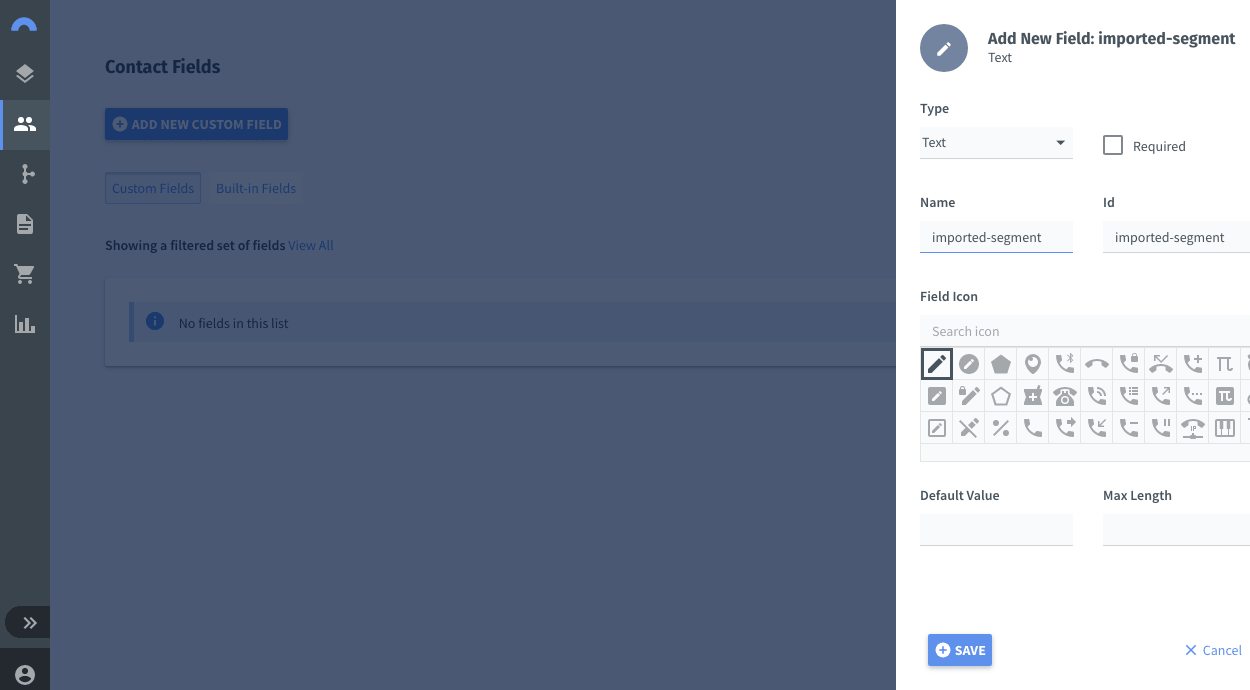
For that, we need to add a custom field for contacts (for example, of the text type). We can name it "imported-segment". This field will store the name of the segment when the import is done for the contacts that we want. Because of that, it's important that the custom field doesn't have a default value. That way, all the contacts in the system will have that field empty, except for those that will be part of the import.
Once in the "Import" page, make sure to check the option "Override existing":
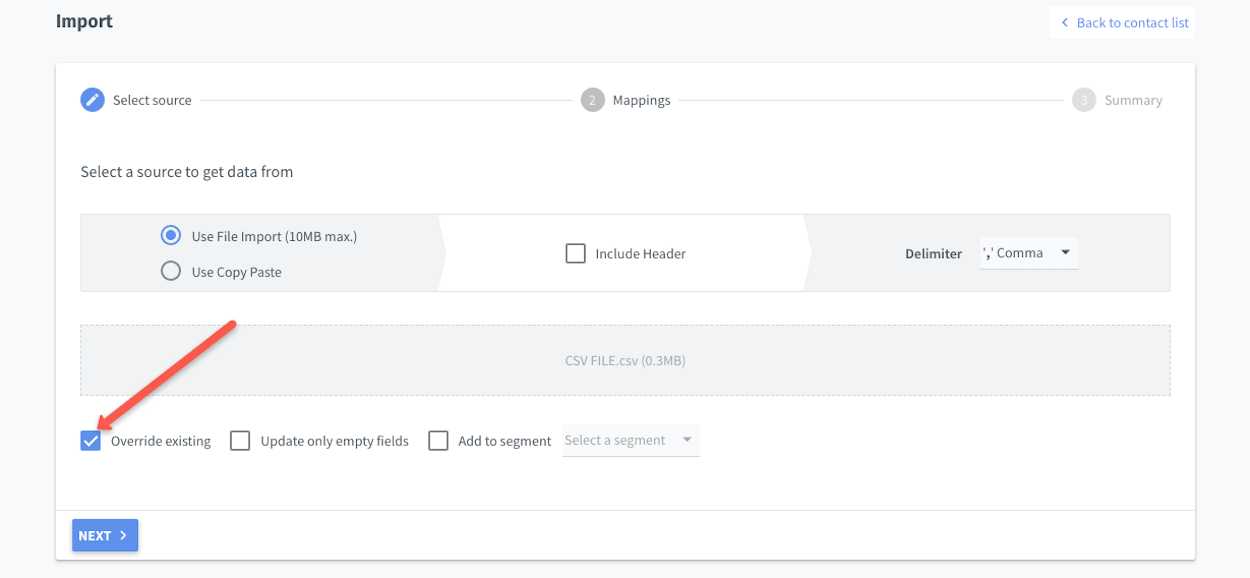
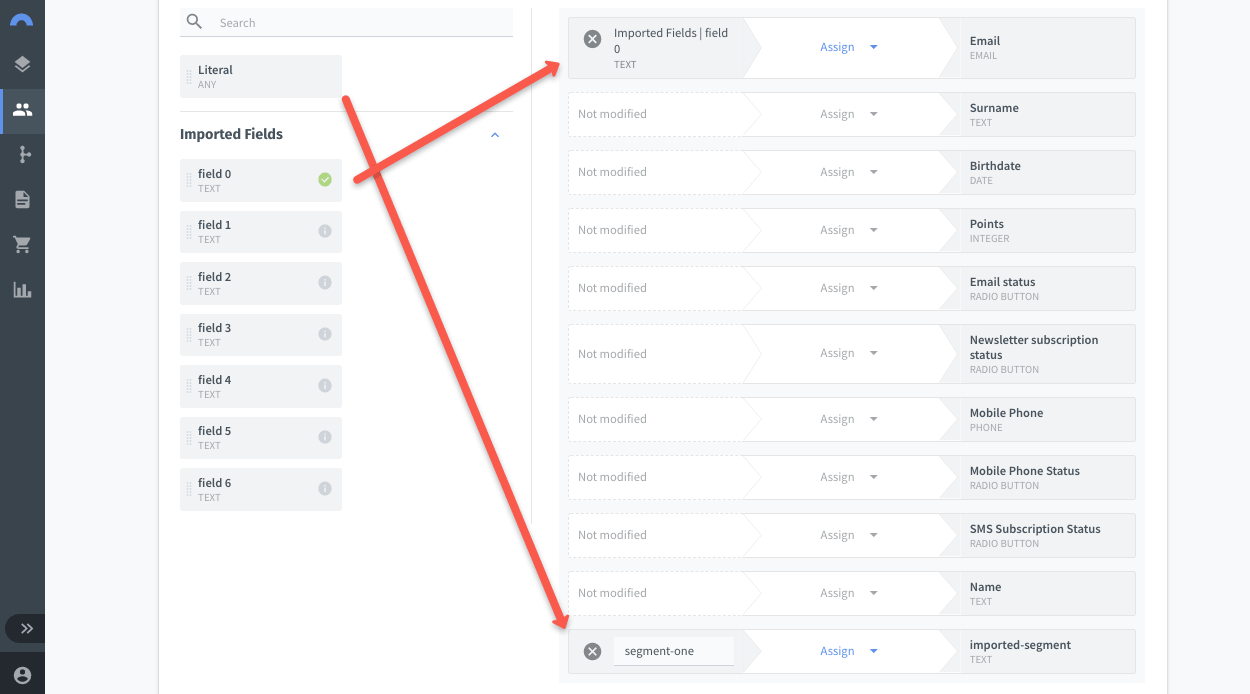
In the next step, we'll do the mappings. We'll assign the email column of the file with the contact email field. Also, we'll associate a literal value to the custom field that we just created. In this case, we'll use the name "segment-one" for that literal value.
That's the end of the import. By now, there must be new contacts created that didn't exist before in Connectif's data base. Moreover, the contacts who already existed that were also in the CSV file must have their custom field filled "imported-segment" with the new information "segment-one".
Finally, we can go an create a dynamic segment focused on this custom field. That is, a segment that contains all the contacts that have "segment-one" in their "imported-segment" field.